Topics
Getting Started
TaskTag is a construction management software that aides the construction companies to overcome the hurdles and increase their efficiency. The application provides the following features to these companies to effectively manage their projects:
- Create and manage a team
- Create, manage and delete projects
- Accelerate your project with chats
- Create task and attach with project
- files added to project, team or task
- Manage access levels
Download and Registration
The application is available on Android, iPhone and Web.
Get the most of TaskTag by installing our new mobile app.
You can use TaskTag Web in your browser.
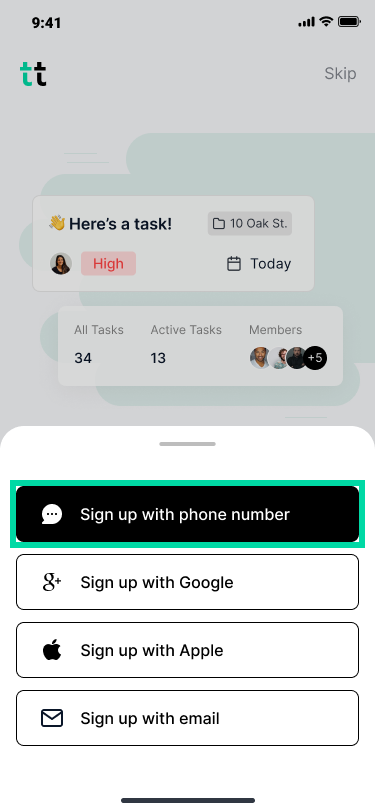
- Click Sign up
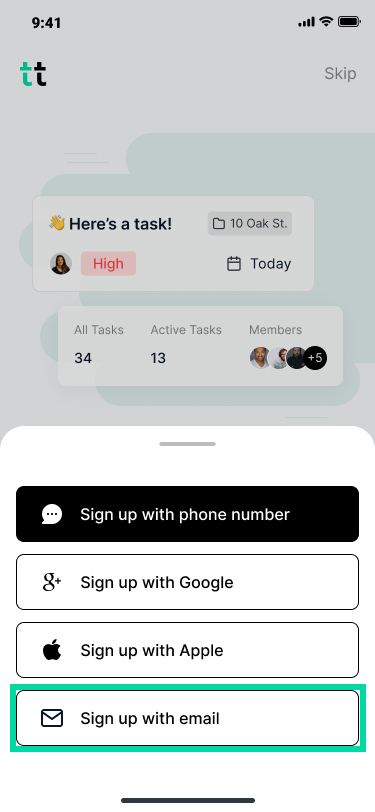
- Click Sign up with Email
- Enter your email
- Enter the password
- Click continue
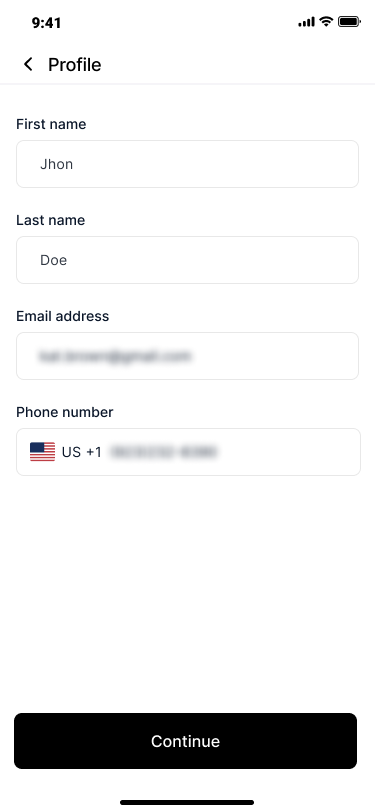
- Enter the first name and the last name
- Enter the email address
- Enter the phone number
- Select your time zone
- Click Continue
- Enter the verification code sent on the registered mobile


- Click Sign up
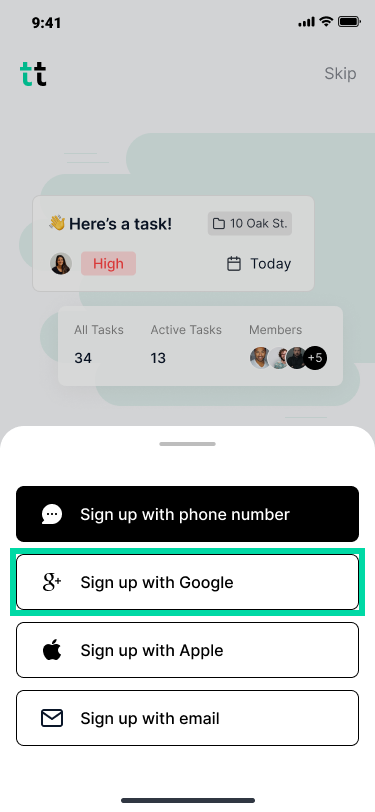
- Click Continue with Google
- Click Continue on the window that displays
- Select your google account
- Confirm all the profile details and click Continue
- Enter the verification code sent on the registered mobile
- Click Sign up
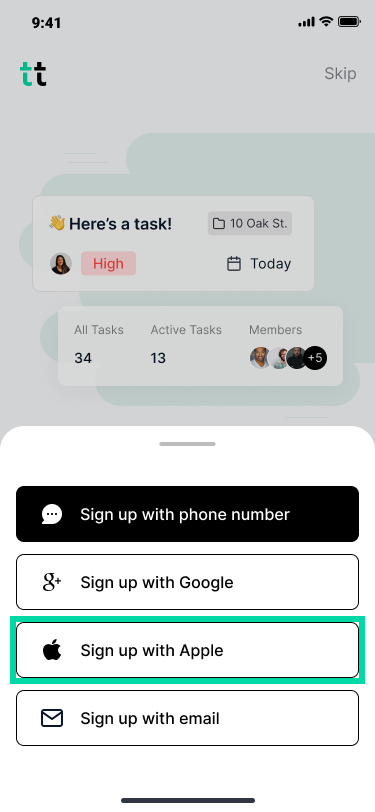
- Click Continue with Apple
- Click Continue on the window that displays
- Confirm all the profile details and click Continue
- Enter the verification code sent on the registered mobile

- Click Sign up
- Click Continue with Phone Number
- Enter your phone number and click Continue
- Enter the verification code sent on the registered mobile
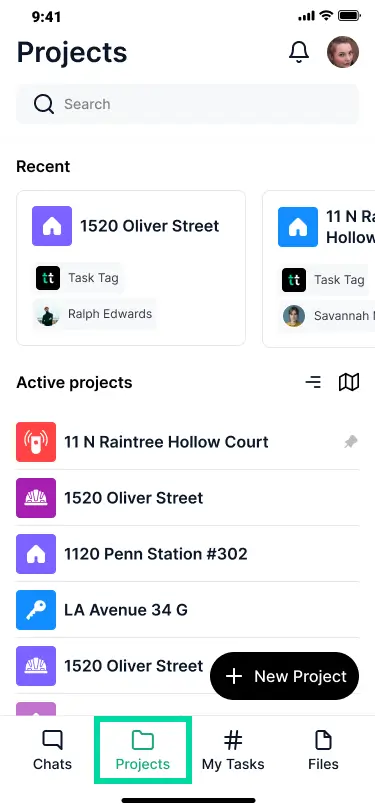
Working with Projects
Projects allows you to manage the team, team members and the tasks. You can create a new project or copy from an existing project.
- Go to the Projects tab
- Click on New Project at the bottom
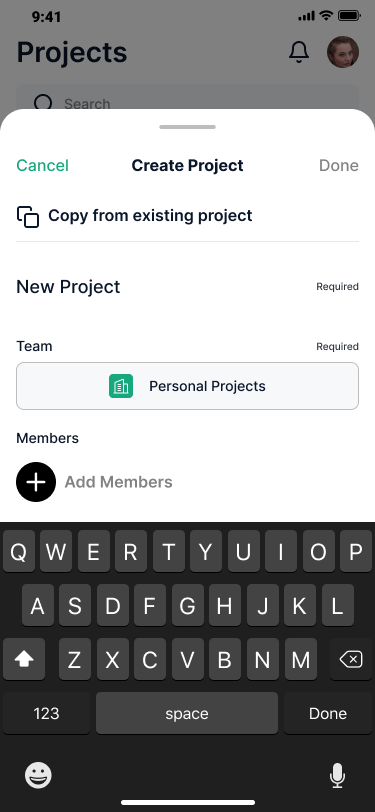
- (Required) Enter the project name
- (Required) In the Team section:
- Click Add Team
- Select your team
- In the Members section:
- Click the + icon to add the members
- Select one or more members
- Click Next to add the members
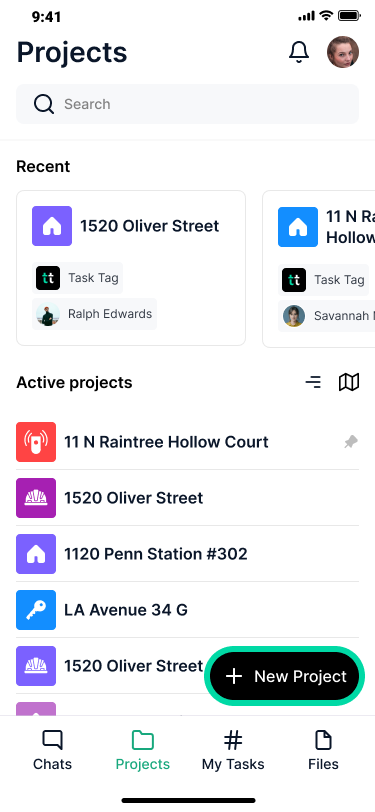

- Go to the Projects tab
- Click on New Project at the bottom
- Click on Copy from existing project
- Select your google account
- Confirm all the profile details and click Continues
- Enter the verification code sent on the registered mobile
- Search the project to copy
- Select the required project details
- Select the required members
- Select the required files
- Click Confirm
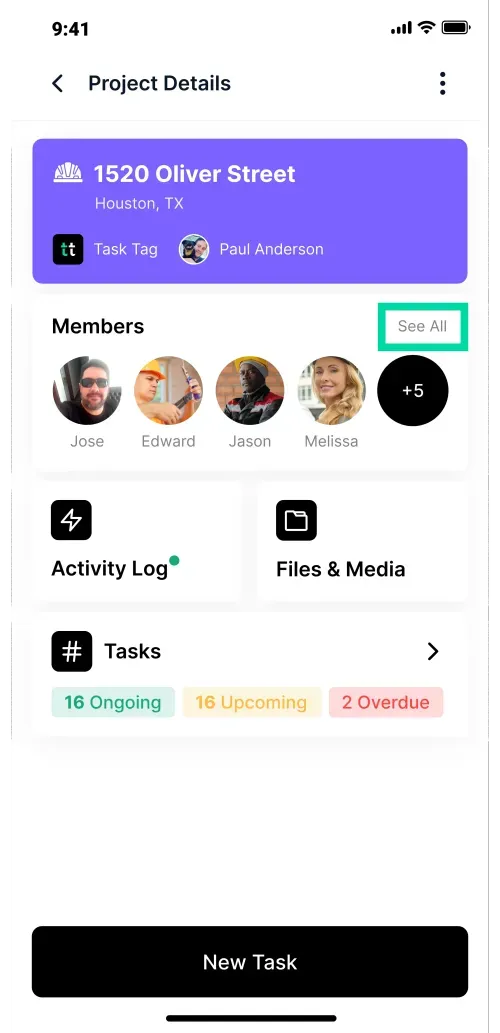
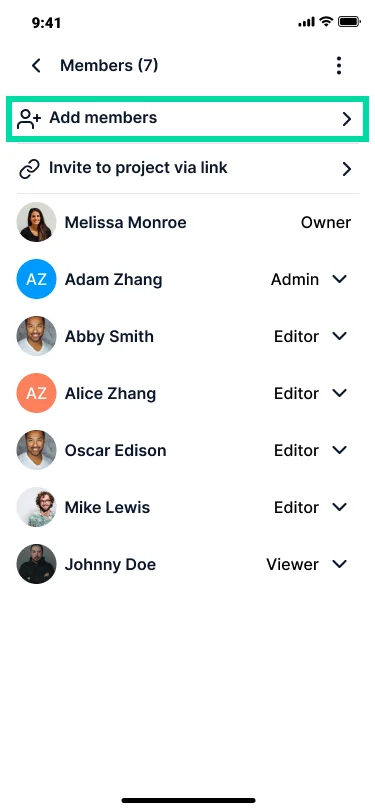
- Go to the Projects tab
- Select the project
- Click See All link in the Members section
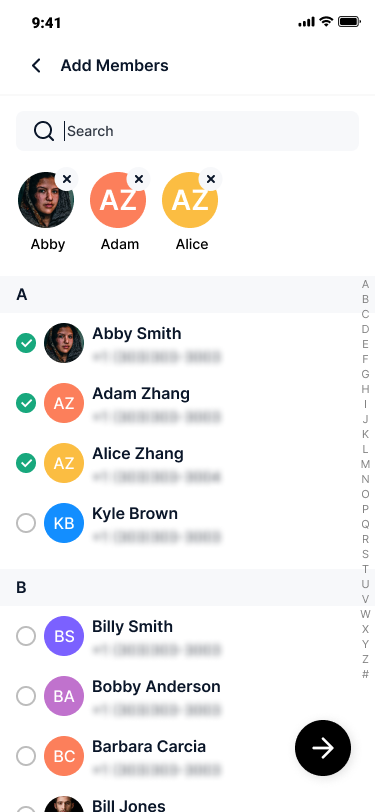
- Click Add Members
- Select the members to add to the project
- Click Next
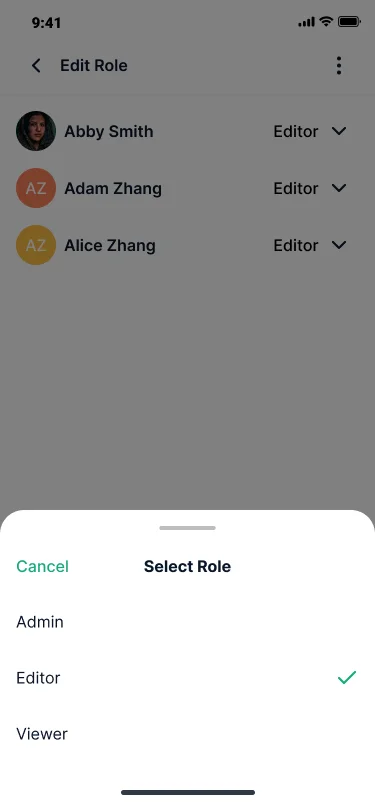
- Assign role to the members
- Click Confirm
Working with Chats
Chats in TaskTag allows you to chat anyone in your team, individually or in group. This functionality plays a pivotal role as it enables an efficient and real-time communication among the team. You can manage files, project, people and tasks using chat. Click the Chats tab and use this feature to do the following:
Note: You can chat with a member only if it is added in your company contacts.
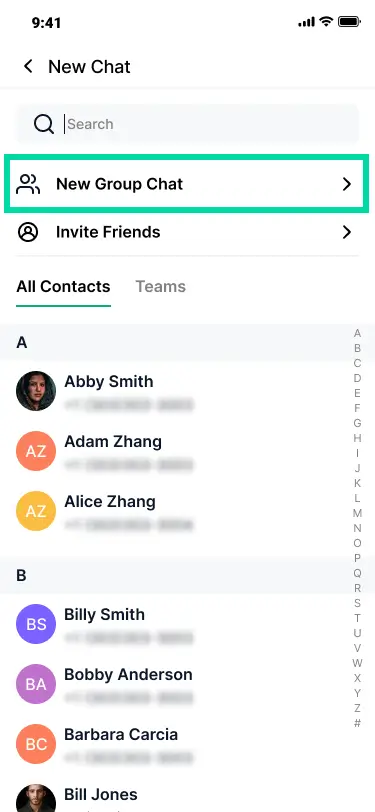
Follow the below steps to start a group chat:
- Go to the Chats tab
- Click New Chat icon
- Search a contact or Invite a friend to TaskTag for chat
Follow the below steps to start an individual chat:
- Go to the Chats tab
- Click New Chat icon
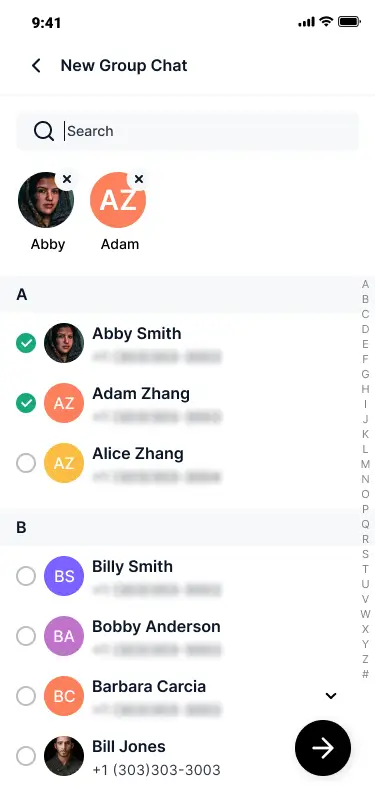
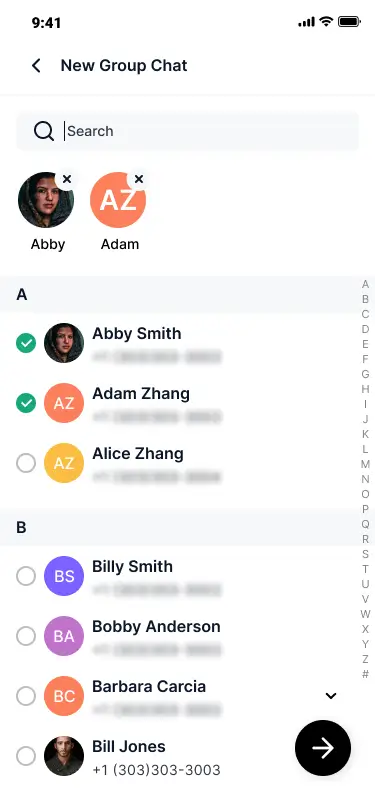
- Click New Group Chat
- Select the members and click Next
- Give name to the group
- Click Create Group

OR
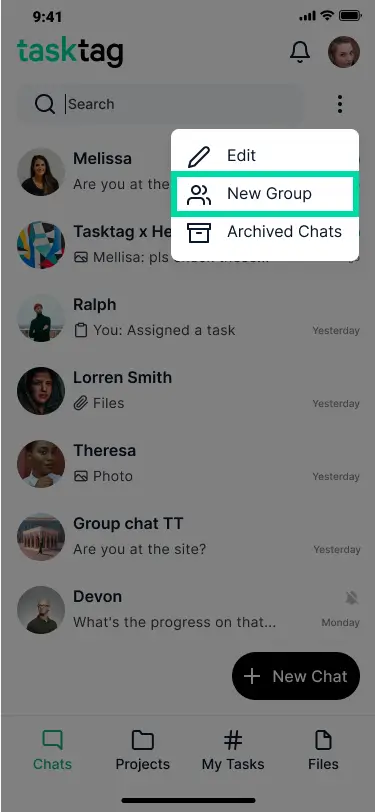
- Go to the Chats tab
- Click the ellipsis icon below the profile photo
- Click New Group
- Select the members and click Next
- Give name to the group
- Click Create Group
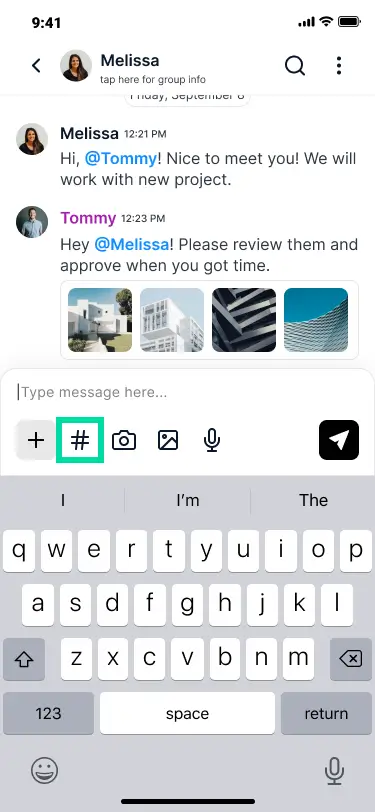
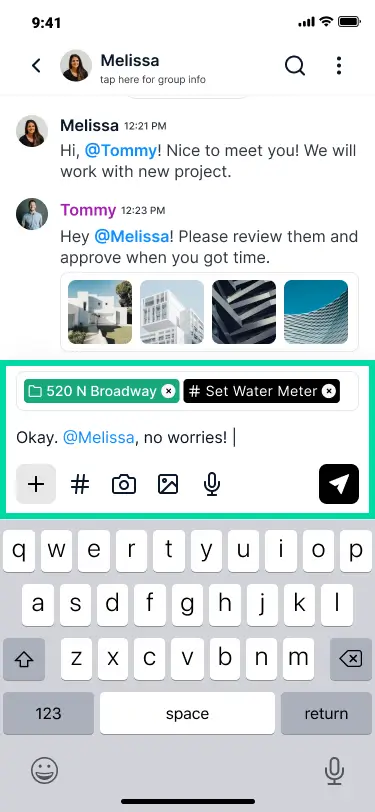
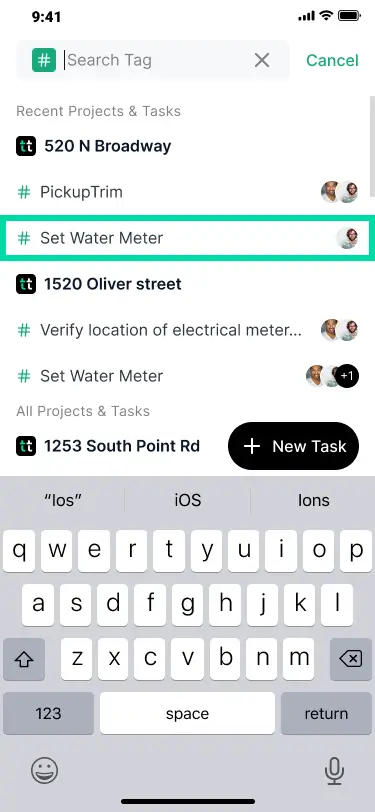
Tagging allows you to assign projects and tasks to the team members within the Chat. Follow the below steps to tag projects or tasks to team members.
- Go to the Chats tab
- Click a chat
- Click the message bar
- Click hashtag (#)
- Select or search the projects or tasks to tag
- (Optional) Type any message along with tagging
- Click the send icon on the right-hand corner
- Click Create Group

- Go to the Chats tab
- Click a chat
- Click the + icon in the message bar
- Click Assign Task
- Select or search the task
- Select the chat members
- Click Confirm
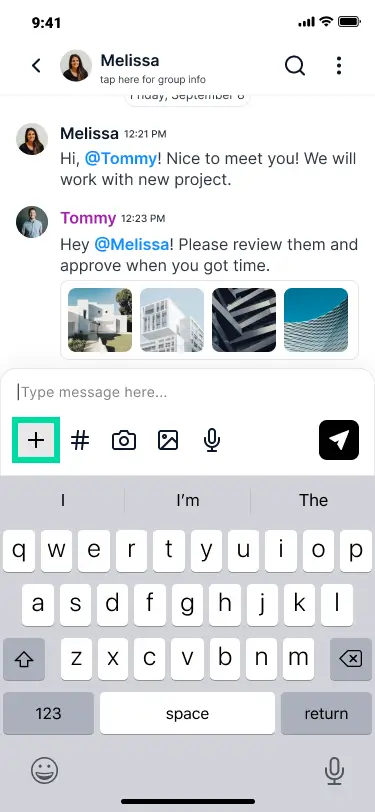
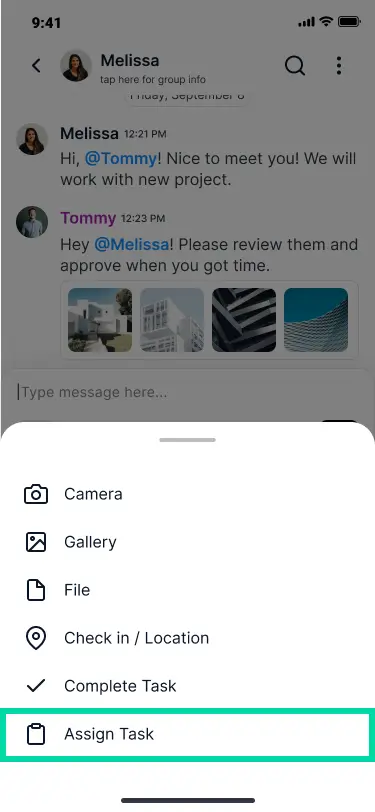
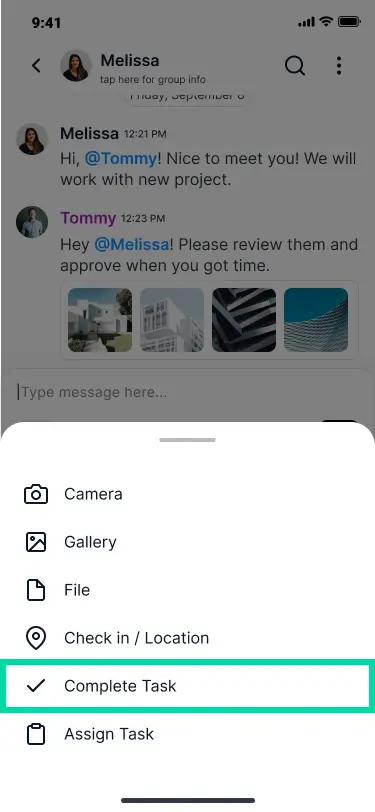
- Go to the Chats tab
- Click a chat
- Click the + icon in the message bar
- Click Complete Task
- Select the task to complete
- Confirm and click Complete

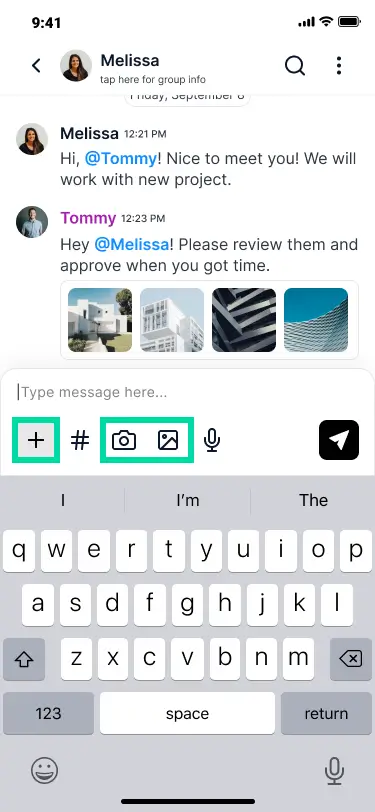
- Go to the Chats tab
- Click a chat
- CYou can upload image and file by the following ways:
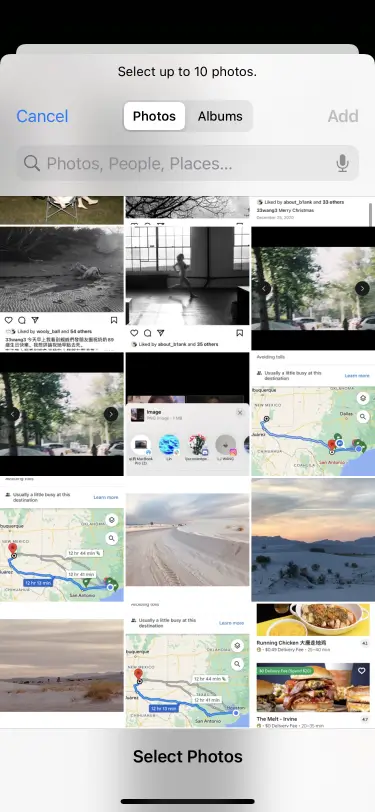
- Click the + icon in the message bar and then Camera or Gallery
- Click the camera or image icon in the message bar
- Select the images/files and clickAdd/Open
- Click the send icon on the right-hand corner
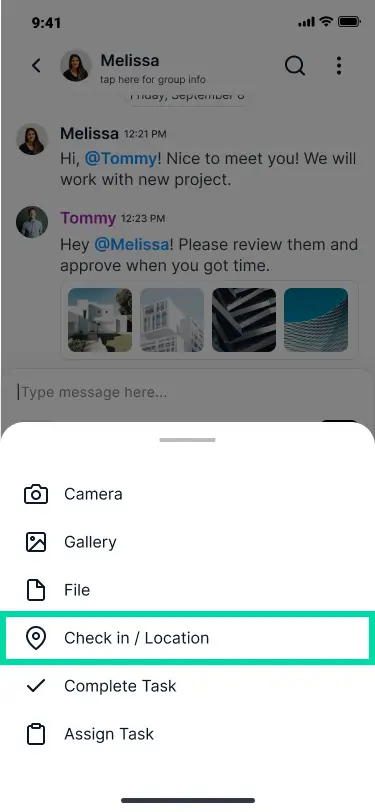
- Go to the Chats tab
- Click a chat
- Click the + icon in the message bar
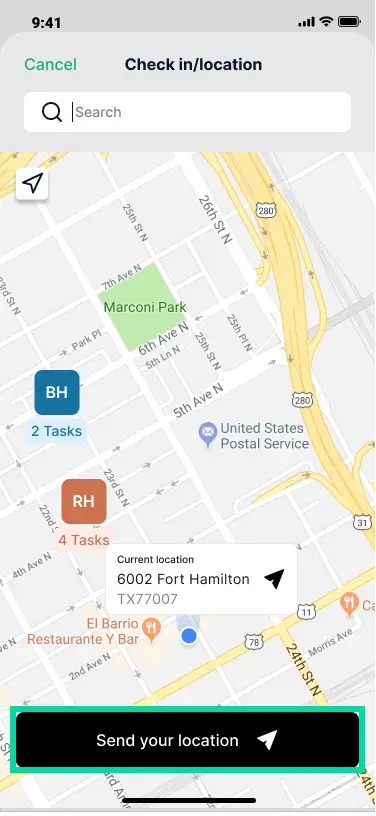
- Click Check in/Location
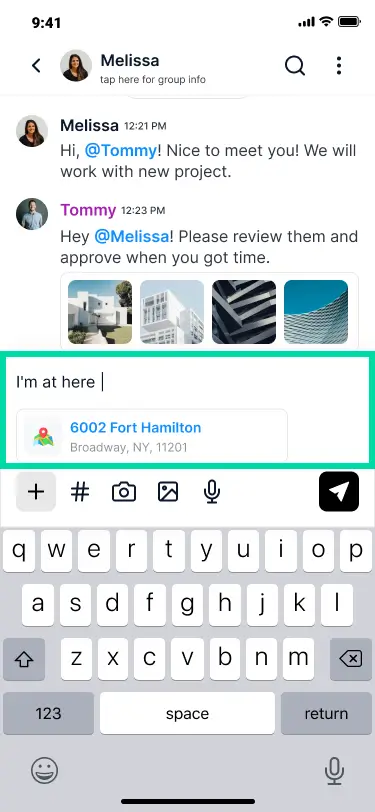
- Select and click Send your location
- (Optional) Type a message
- Click the send icon
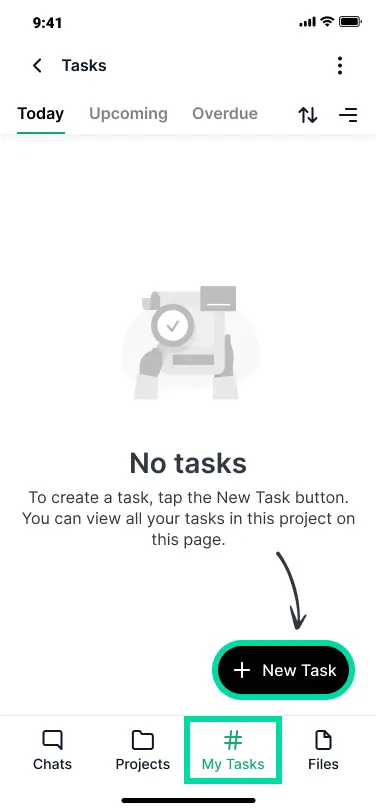
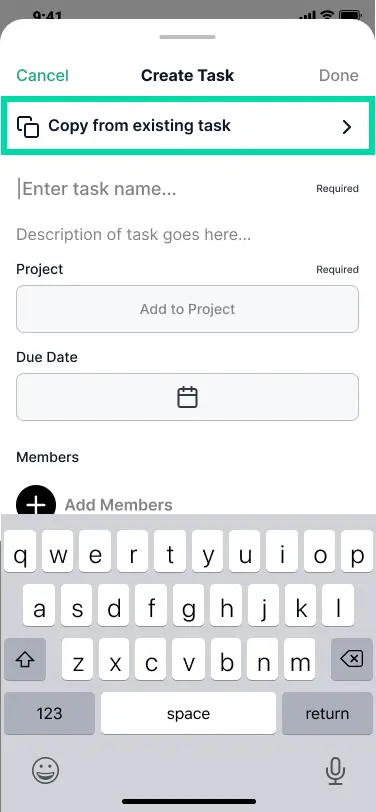
Working with Tasks
Use the application to create and manage the tasks for different projects. You can create a new task within an existing project or from the My Tasks tab.
- Click on the Projects tab
- Click New Task. The Create Task page displays
- (Required) Enter the Task Name
- Select a Due Date for the task from the calendar
- Add Members to assign this task
- Click Done

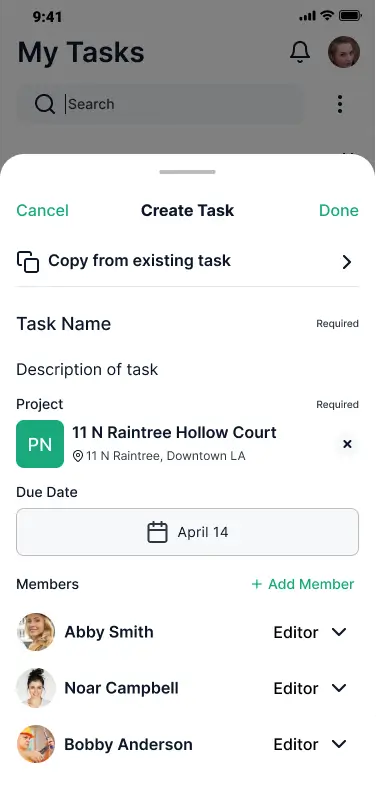
- Click on My Tasks tab
- Click on New Task. The Create Task page displays
- (Required) Enter the task name
- Enter the description of the task
- (Required) Select a project to add the task
- Select a Due Date for the task from the calendar
- Add Members to assign this task
- Click Done

- To copy from an existing task either:
- Go to My Tasks tab or
- Select an existing project from the Projects tab
- Click New Task.
- Click Copy from existing task
- Search and select the task from the list
- Select required task details
- Click Done
- Select the Due Date
- Add Members
- Click Done


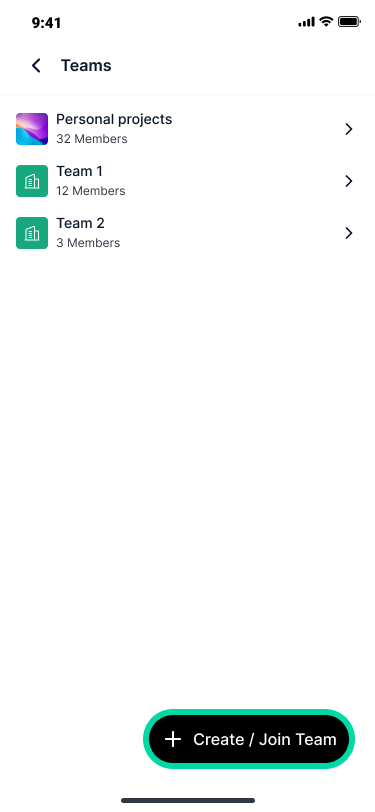
Working with Teams
To start using the application, first create or join a team. Teams allows you to create a team and manage the team members.
The application is available on Android, iPhone and Web.
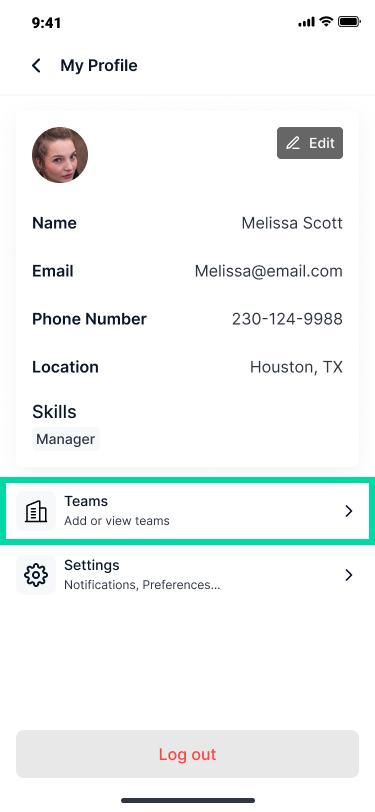
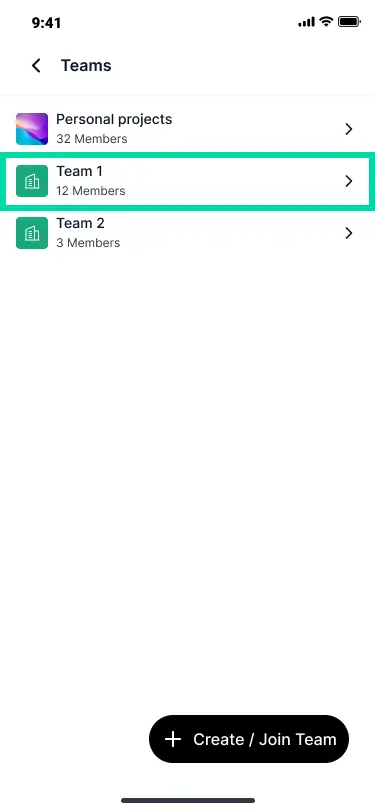
- Got to My Profile
- Click Teams
- Click Create/Join Team
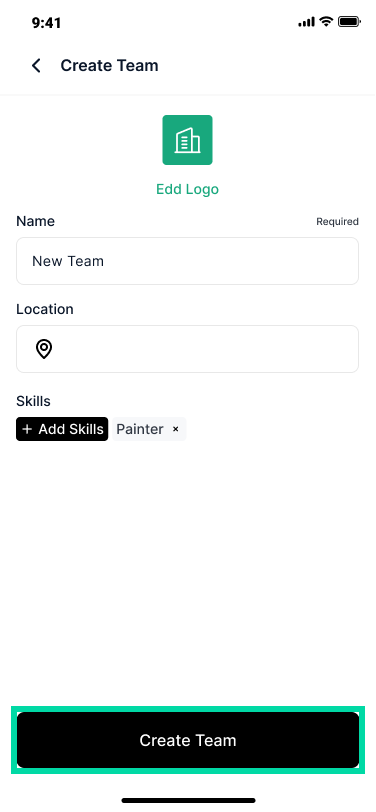
- Click Createa a Team
- Click Add Logo to browse or click an image
- (Required) Enter team name
- (Optional) Select or enter the Address
- (Optional) Add Skills
- Click Createa a Team


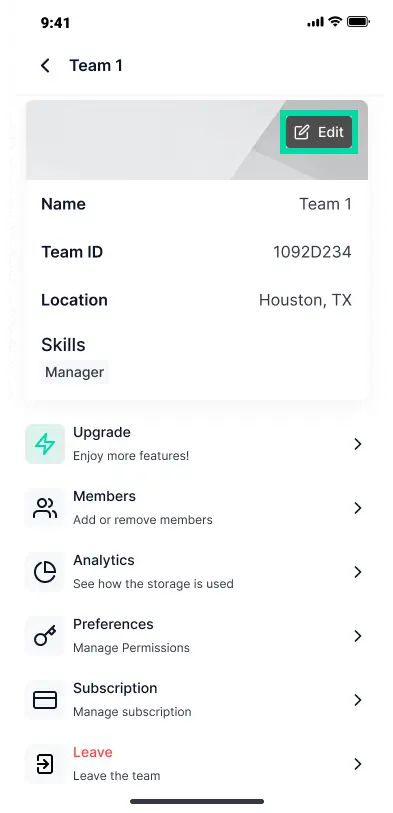
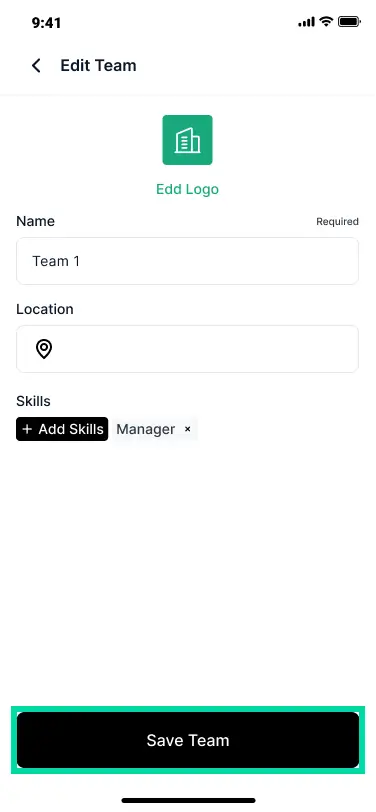
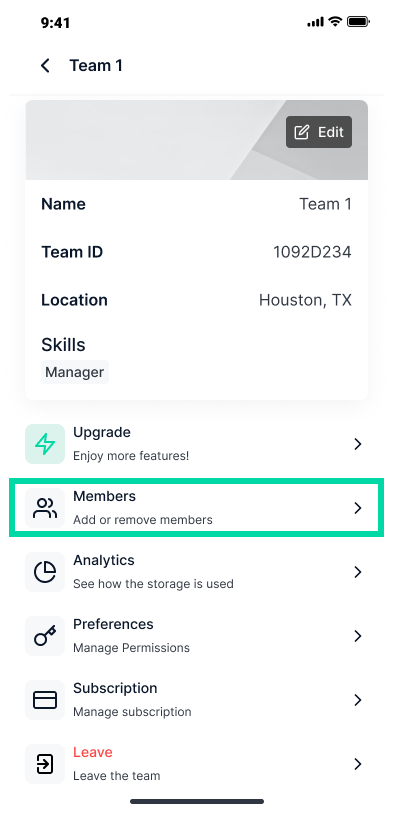
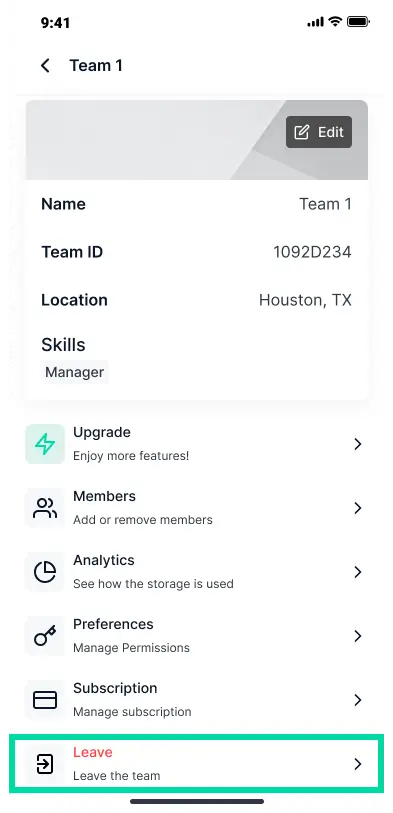
- Got to My Profile
- Click Teams
- Select your team
- Click Edit on the top-right corner
- Edit the required fields
- Click Save Team
To join a team, please contact the Team Owner to add you to their team.
- Got to My Profile
- Click Teams
- Select your team
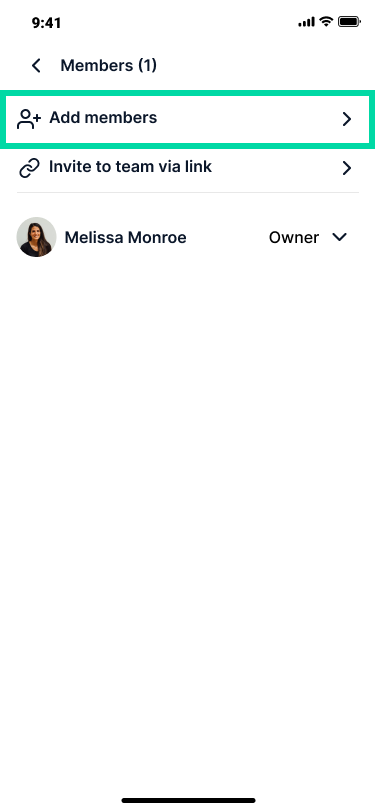
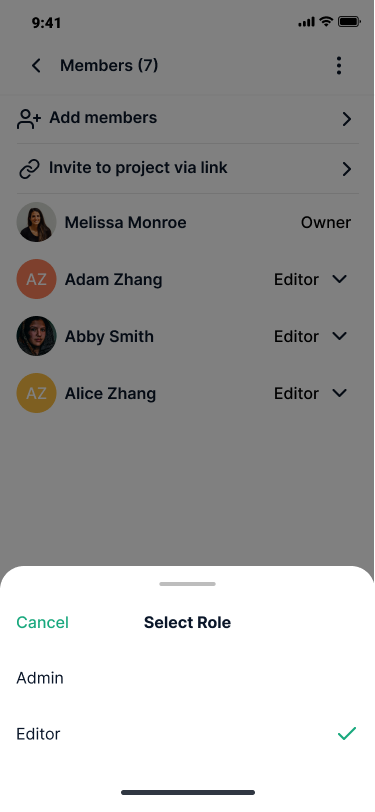
- Click EditMembers
- Click Add Members
- Select the members and click Next
- Assign role to the new members
- Click Confirm

- Got to My Profile
- Click Teams
- Select your team
- Click Leave
- Click Assign to assign a new owner to the team
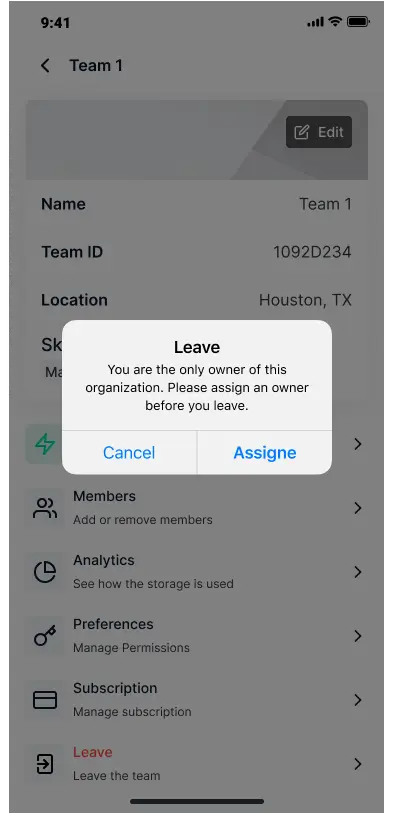
To leave a team it is mandatory to assign a new owner from the team members. You can delete a team if you are the only member.
Working with Files
Files feature in TaskTag allows you to store the media and files via chat. You can tag them to project/tasks to view under Files tab.
- Go to the Files Tab
- Search and click a project in All Files section
- Click Add File
- Add Members to assign this task
- Go to the Files Tab
- Search and click a project in All Files section
- Search the file/media/task files uploaded within the project
Image Files
- .jpg / .jpeg (Joint Photographic Experts Group)
- .png (Portable Network Graphics)
- .gif (Graphics Interchange Format)
- .svg (Scalable Vector Graphics)
Document Files
- .pdf (Portable Document Format)
- .doc / .docx (Microsoft Word Document)
- .xls / .xlsx (Microsoft Excel Spreadsheet)
- .ppt / .pptx (Microsoft PowerPoint Presentation)
- .txt (Plain Text File)
- .rtf (Rich Text Format)
- .odt (OpenDocument Text Document)
Audio Files
- .mp3 (MPEG Audio Layer III)
- .wav (Waveform Audio File Format)
- .aac (Advanced Audio Coding)
- .ogg (Ogg Vorbis Audio File)
Video Files
- .mp4 (MPEG-4 Video)
- .avi (Audio Video Interleave)
- .mov (Apple QuickTime Movie)
- .wmv (Windows Media Video)
Compressed Files
- .zip (ZIP Archive)
- .tar (Tape Archive)
- .7z (7-Zip Archive)
Working with Access Levels
Following features have different permissions granted to different roles in the organization:
Owner/Admin
The owner/admin in a team has permission to do the following:
- Create/edit/delete a project
- Create/edit/delete a task in a project
- Add admins within the team
- Add members within the team
- View/add/delete team contact
- Upgrade member to admin
- Upgrade member to owner (Only Owner has the Permission)
- Add payment method (Only Owner has the Permission)
- Remove existing payment method (Only Owner has the Permission)
- Cancel a subscription (Only Owner has the Permission)
- Use Hashtag in individual or group chat to tag project/task
- Complete or assign a task in chat
- Upload file/images and share location in chat
Member
The member in a team has permission to do the following:
- View all members in the team
Owner/Admin
The owner/admin in a project has permission to do the following:
- Edit/delete/leave a project
- Copy from an existing project
- Add/remove admins and members to the project
- Create/edit/remove/view task in a project
- Add/edit/remove/view members in a task
- Archive/Unarchive a project
- Export project updates
- Share/upload/edit/download/delete a project file or folder
- Delete/share/download files in archived projects
- Share/view/delete/edit/share/download/upload all task files
- Use Hashtag in individual or group chat to tag project/task
- Complete or assign a task in chat
- Upload file/images and share location in chat
Editor
The member in a team has permission to do the following:
- Add members to a project
- Copy from an existing project (Owner receives the notification)
- Create/edit/remove/view task in a project
- Add/remove/view members in a task
- Edit member permissions in a task
- Access to archived project
- Leave a project
- Share/upload/comment/download/delete a project file or folder
- Download files in archived projects
- View project updates
- Use Hashtag in individual or group chat to tag project/task
- Complete or assign a task in chat
- Upload file/images and share location in chat
Viewer
The viewer in a project has permission to do the following:
- View task in project
- View member info/role
- Leave a project
- Upload/comment/download a project file or folder
- View/download files in archived projects
- View project updates
Owner/Admin
The owner/admin in a team has permission to do the following:
- Add/edit/delete viewers to task
- Upload/share/save task files
- Delete task files (Only Owner has the Permission)
- Complete a task
- Delete a task (Only Owner has the Permission)
- Share/copy/leave a task
- View/edit/export project
- Add the assignees/viewers in a task
- Delete the assignees/viewers in a task (Only Owner has the Permission)
- Transfer a task owner
- Transfer roles from assignee to viewer or vice-versa
Viewer
The viewer in a task has permission to do the following:
- Download/save task files
- Upload/share task files
- Share/leave a task
Billing & subscription
You can always contact us info@tasktag.com
If you are over the 3 project limit when your trial ends, you will lose access until you enter credit card information or contact us to upgrade.
Yes, there are both options available for billing, Monthly and Yearly. Yearly billing is discounted.
All the features are the same as your existing subscription, though adding and removing users works just a little differently. Your initial annual bill is based on the amount of users you have when you start paying. When you add a user, you'll be charged at a prorated cost starting the day you add them, just like you are on the monthly plan, but the charge will be for the rest of the year. When you deactivate a user, you'll have an empty seat that you can fill with a new user. If you don't fill the seat, your bill will update based on your current active numbers when your account renews.
Viewer: If the owner (admin) of the project has added you as viewer, you will have access to the project items to view and can be assigned tasks. You will not be able to edit anything.
Member: If the owner (admin) of project has added you as member, you will have access to teams/projects with edit rights for the items of project. You will not be able to edit the project's own attributes.
Admin: If you are the owner (admin) of the project, you will have access to edit/delete/archive/set new admin.
It is possible to switch from Plus to Team subscription.
Billing will be calculated based on the number of members and time spent on Plus subscription and then remaining duration will be adjusted based on the available balance
Sorry, no refunds. You can cancel your subscription whenever you'd like.
You can cancel your subscription whenever you'd like, and you will still have access to your account for the paid duration. You will be downgraded to the features of the Free plan.
Any project and Team you create during your trial will still be available in your account. You will not be able to create any new projects or edit existing projects.